WhatsApp is a freeware, cross-platform messaging and Voice over IP (VoIP) service owned by Facebook, Inc. It allows users to send text messages and voice messages, make voice and video calls, and share images, documents, user locations, and other media.
WhatsApp is one of the most popular messaging apps in the world. It has over 2 billion active users and is available in 120 different languages.
Before we get started
Before we get started with intergrating WhatsApp, we need a few things:
- A Sarufi bot. If you don’t have one, you can click here to create one here.
- A WhatsApp business account
- An access token from your WhatsApp Cloud API
How to connect to WhatsApp Cloud API
To connect to WhatsApp Cloud API, you need to create a WhatsApp Business account. You can do this by following the instructions in Get started (Cloud API).
Here are steps to follow to get started:
Go to your apps.
Select app type >> Business.
You will be required to fill-in basic app information >> click create app button.
You will be redirected to the Product section. Add
WhatsAppas your product by clicking set up.Getting Credentials
This section will guide you on how to obtain whatsapp cloud credentials and Sarufi credentials if you are doing custom deployment. More details on how to create a permanent token and phone number can be found here.
- Sarufi Dashboard
- Custom Deployment
Whatsapp Cloud Credentials
- On your Meta Developer dashboard, Navigate to
Whatsapp-->API setup - There, you will see a Temporary Access Token and WhatsApp test number with its Phone Number ID.
- Finally, verify the number you will be using for testing in the To field.
In this part of integration with WhatsApp, we will walk through the journey using either Sarufi Dashboard or self-served deployment (custom deployment) for integration.
Getting Started
All the steps shown/illustrated here assume you already created a Sarufi account and have a bot created. If you don't have an account, you can create one here.
- Sarufi Dashboard
- Custom Deployment
In this guide, we are going to use Sarufi Dashboard to connect to the WhatsApp Cloud API. Sarufi is a no-code platform that allows you to build chatbots and deploy them to different channels.
Log into your Sarufi account.
Create a bot. You can follow the instructions here.
Navigate to settings in your bot, located at top right corner. Click on
Integration>>WhatsAppAdd your WhatsApp token and Phone Number ID. Read on how to get WhatsApp credentials here. The system will create a random verification token for you. You can change it if you want to.
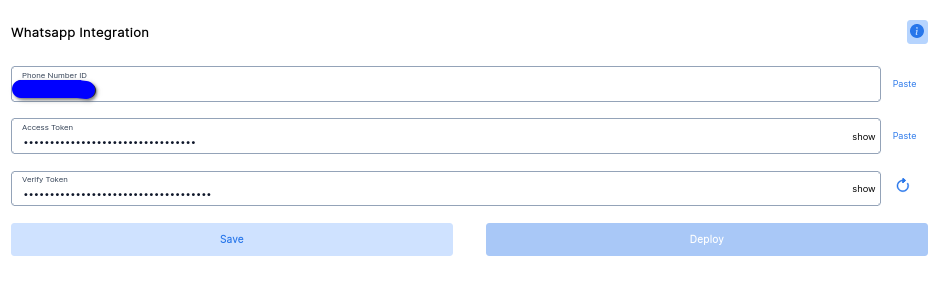
Once you have added your WhatsApp token and Phone Number ID, you are ready to deploy your bot to WhatsApp. Click on
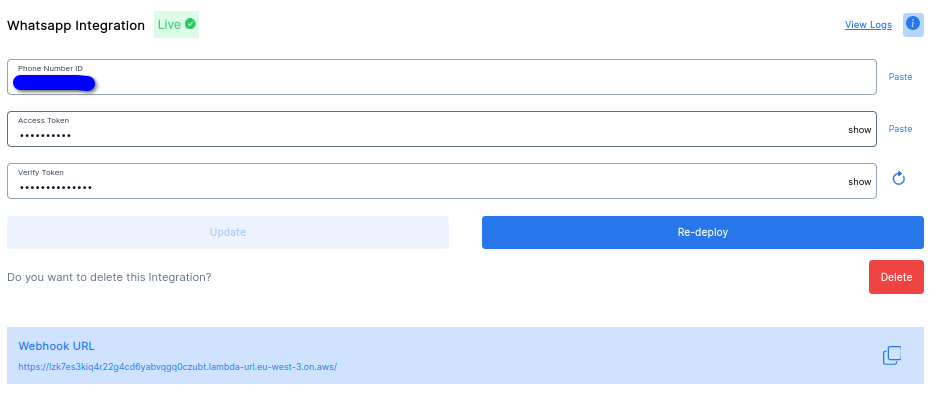
Savebutton thenDeployWait for your job to finish. Once done, you will have a webhook URL presented to you. Copy the URL and follow the steps at Setting up a WhatsApp webhook. You will also need to copy the verification token and paste it in your WhatsApp cloud account.
After setting up the webhook, you will need to subscribe to the message topic. Navigate to webhook fields --> click
manageto subscribe to themessagetopic. Read more on webhook field subscription here.When this is done, the bot is ready. Activate your bot in WhatsApp by sending it a text.
In case you want to change some of your credentials from WhatsApp Cloud, just update your credentials in your dashboard and click
Updatebutton. ThenRe-deployagain.You can view your bot logs by clicking
View Logsbutton.You can see the deployed PizzaBot in whatsapp in the GIF below.
With custom deployment, you will be able to host the bot on your own server. This is the best option if you want to have full control over your deployment. This section shows how to do custom deployment using Python. Other languages will be added soon.
What you need
You will need a webhook to receive whatsapp messages. The webhook provides a way for an application to notify another application when a new event has occurred. So whatsapp cloud will send messages to your webhook.
There are several ways this can be done. This tutorial will guide you in using
Ngrokorreplit. Choose one that suites you.
- Using Ngrok
- Using Replit
This section illustrate how to use Ngrok to create a webhook. Ngrok is a multiplatform tunnelling, reverse proxy software that establishes secure tunnels from a public endpoint such as the internet to a locally running network service while capturing all traffic for detailed inspection and replay.
Make sure you have ngrok installed in your working machine.
You will have to modify some commands shown here to suite your working environment. The commands like python3 and pip3 will depend on your working environment. You may have to use python and pip instead.
Create project folder.
Create a project folder named
whatsapp-bot. Navigate into it to create a virtual evironment namedwhatsapp-bot-env. Activate the environment.Run the command to make the magic 🔥 happen.
For Unix-based systems [Linux and Mac]
Install virtual environment
This step is optional as you may have a Python virtual environment already installed. If not, you can install it by running the command below.
sudo apt install python3-venvCreate project folder and virtual environment
mkdir whatsapp-bot
cd whatsapp-bot
python3 -m venv whatsapp-bot-env
source  whatsapp-bot-env/bin/activate
For Windows
Install a virtual environment
This step is optional as you may have Python virtual environment already installed. If not, you can install it by running the command below.
pip install virtualenvCreate the project folder and a virtual environment
mkdir whatsapp-bot
cd whatsapp-bot
python -m venv whatsapp-bot-env
whatsapp-bot-env\Scripts\activate.bat
Clone Blueprint repo
We are going to clone a blueprint repo and install the required packages in our virtual environment.
git clone https://github.com/Neurotech-HQ/sarufi-heyoo-blueprint.git
cd sarufi-heyoo-blueprint
pip3 install -r requirements.txt
Create a file named
.envin your working folder to hold environment variables. You can use a text editor to create the file.In the file add the following. Read on how to get WhatsApp and Sarufi creds
 SARUFI_API_KEY = Your Sarufi API KEY
 SARUFI_BOT_ID   = Your Bot Id
 WHATSAPP_TOKEN  = Your Whatsapp token
 PHONE_NUMBER_ID = whatsapp phone number id
VERIFY_TOKEN = Your verify tokennoteThe verification token is a random string. You can just create a random string and use it as your verification token. You can use any random string, but make sure you don't lose it because you will need to use the same string when we are setting up the webhook.
Once you have environment variables set, you are ready to fire 🚀 your
main.pyup in the activated virtual envirnoment.python3 main.pyRun the command below to start ngrok.
./ngrok http 5000Note:keep the port number the same as used inmain.pyFinish up. After running the command, you will have to copy the URL ngrok provides. The URL looks like
https://xxxxxxxxxxx.ngrok.io.With the provided URL, follow the steps at Setting up WhatsApp webhooks.
Copy the
VERIFY_TOKEN, added as environment variable. Then paste into verify token section in your whatsapp cloud --> verify and save.You can read more about subscribing to message topics up here. When this step is done, the bot is complete. Activate your WhatsApp bot by sending it a text.
See the deployed WhatsApp PizzaBot in the gif below.
Log into your Replit account.
Fork the repo WhatsApp bot using Sarufi API and heyoo into your account.
Navigate to Tools--> Secrets to create environment variables. Read Getting WhatsApp and Sarufi credentials.
Create Secrets as shown below.
Secrete key Description PHONE_NUMBER_IDWhatsapp cloud phone ID WHATSAPP_TOKENYour whatsapp token SARUFI_API_KEYYour sarufi API KEY SARUFI_BOT_IDYour sarufi bot id VERIFY_TOKENYour verify token noteYou can use any name for your secret keys. Just make sure you use the same name in your script. The verification token is a random string. You can just create a random string and use it as your verification token.
Run the script
After creating the secret keys, click
Runbutton. A small webview window will open up with a URL that looks likehttps://{your repl name}.{your replit username}.repl.co.With the url, follow simple steps at Setting whatsapp webhook.
Final touches
Go into your repl, copy the
VERIFY_TOKEN--> paste into verify token in your whatsapp cloud --> verify and save.You can read more about subscribing to message topics up here. When this step is done, the bot is complete. Activate your WhatsApp bot by sending it a text.
See the deployed WhatsApp PizzaBot in the gif below.
Whatsapp Cloud Credentials
Navigate to
Whatsapp-->API setupto get your WhatsApp cloudtokenandPhone Number IDto be used.You will have the access token and Phone Number ID.

Getting Sarufi Credentials
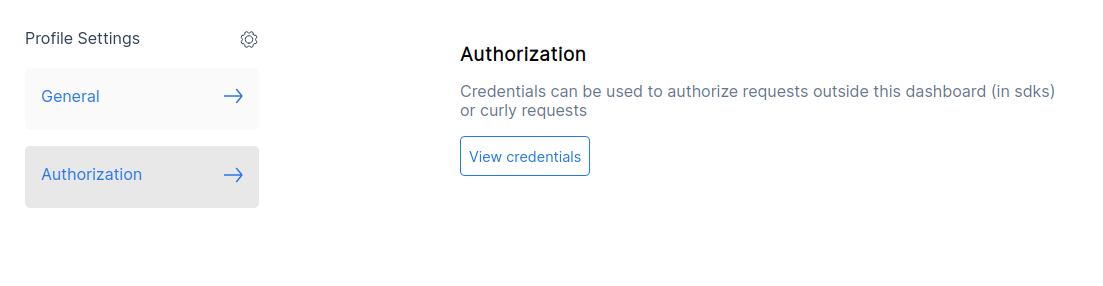
To authorize our chatbot, we are going to use our authorization keys from Sarufi. Log in into your Sarufi Account. Go to your Profile in your Account to get your authorization keys.
For Bot ID, Navigate to Settings in your bot and copy the
Bot ID.
Create Permanent token
With just few steps, you will be able to create a permanent token and add your phone number. This token will be used to authorize your bot to send messages on WhatsApp.
- Create a System User
Navigate to Meta Business Suite --> Your account --> Settings (gear icon)

Navigate to
Users-->System Users--> Click onAddAdd name of system user --> Set role to
Admin--> clickSave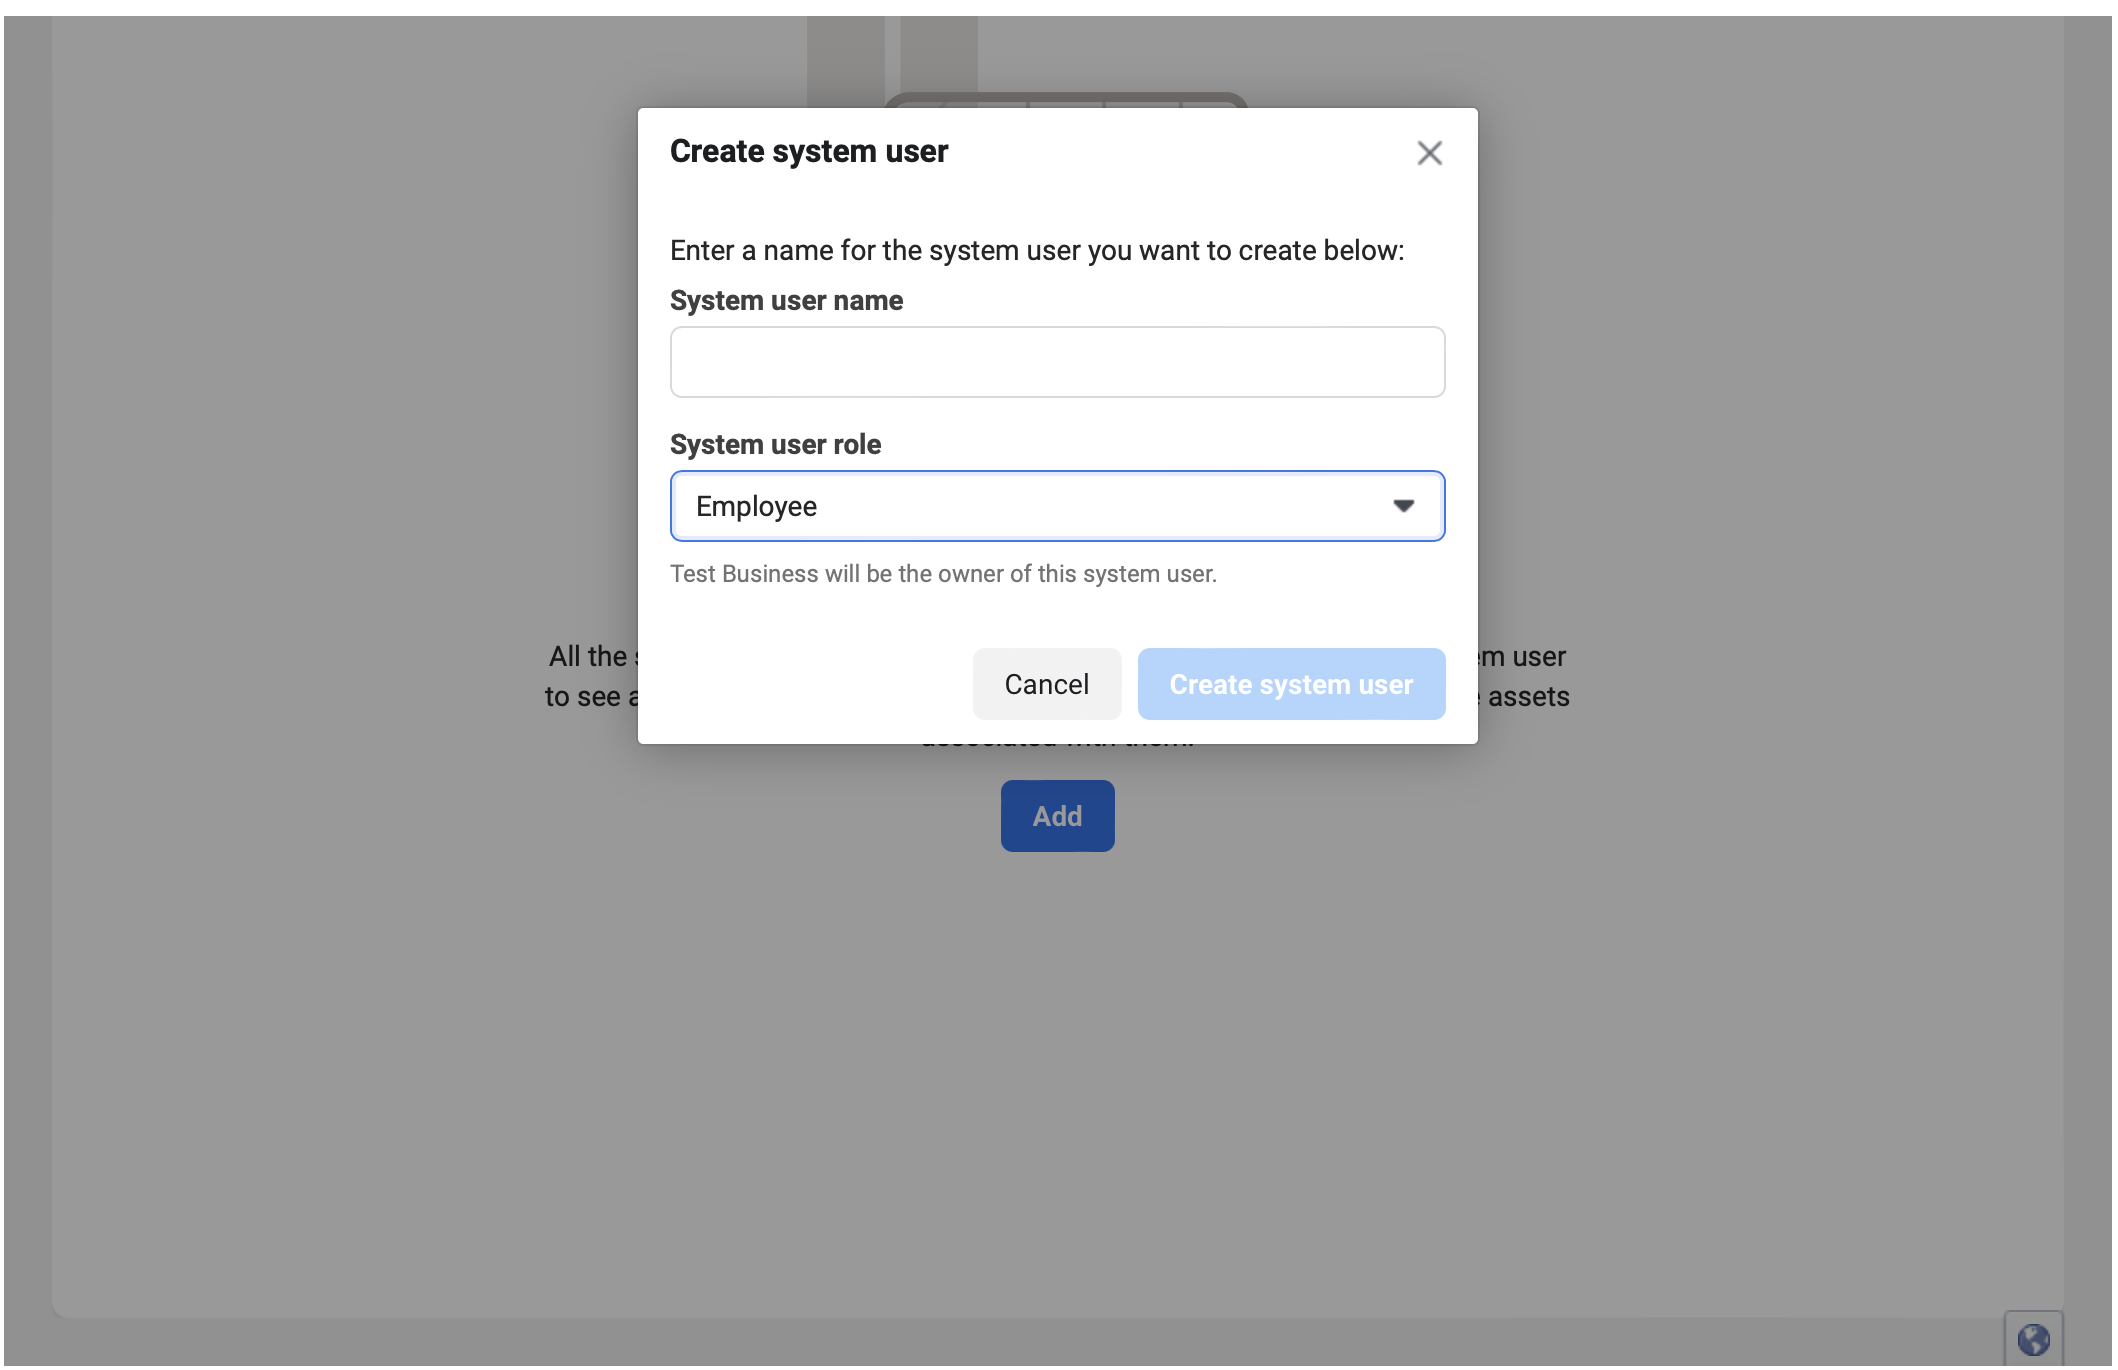
- Add your App to Assets
After creating a system user, navigate to
Assign Assets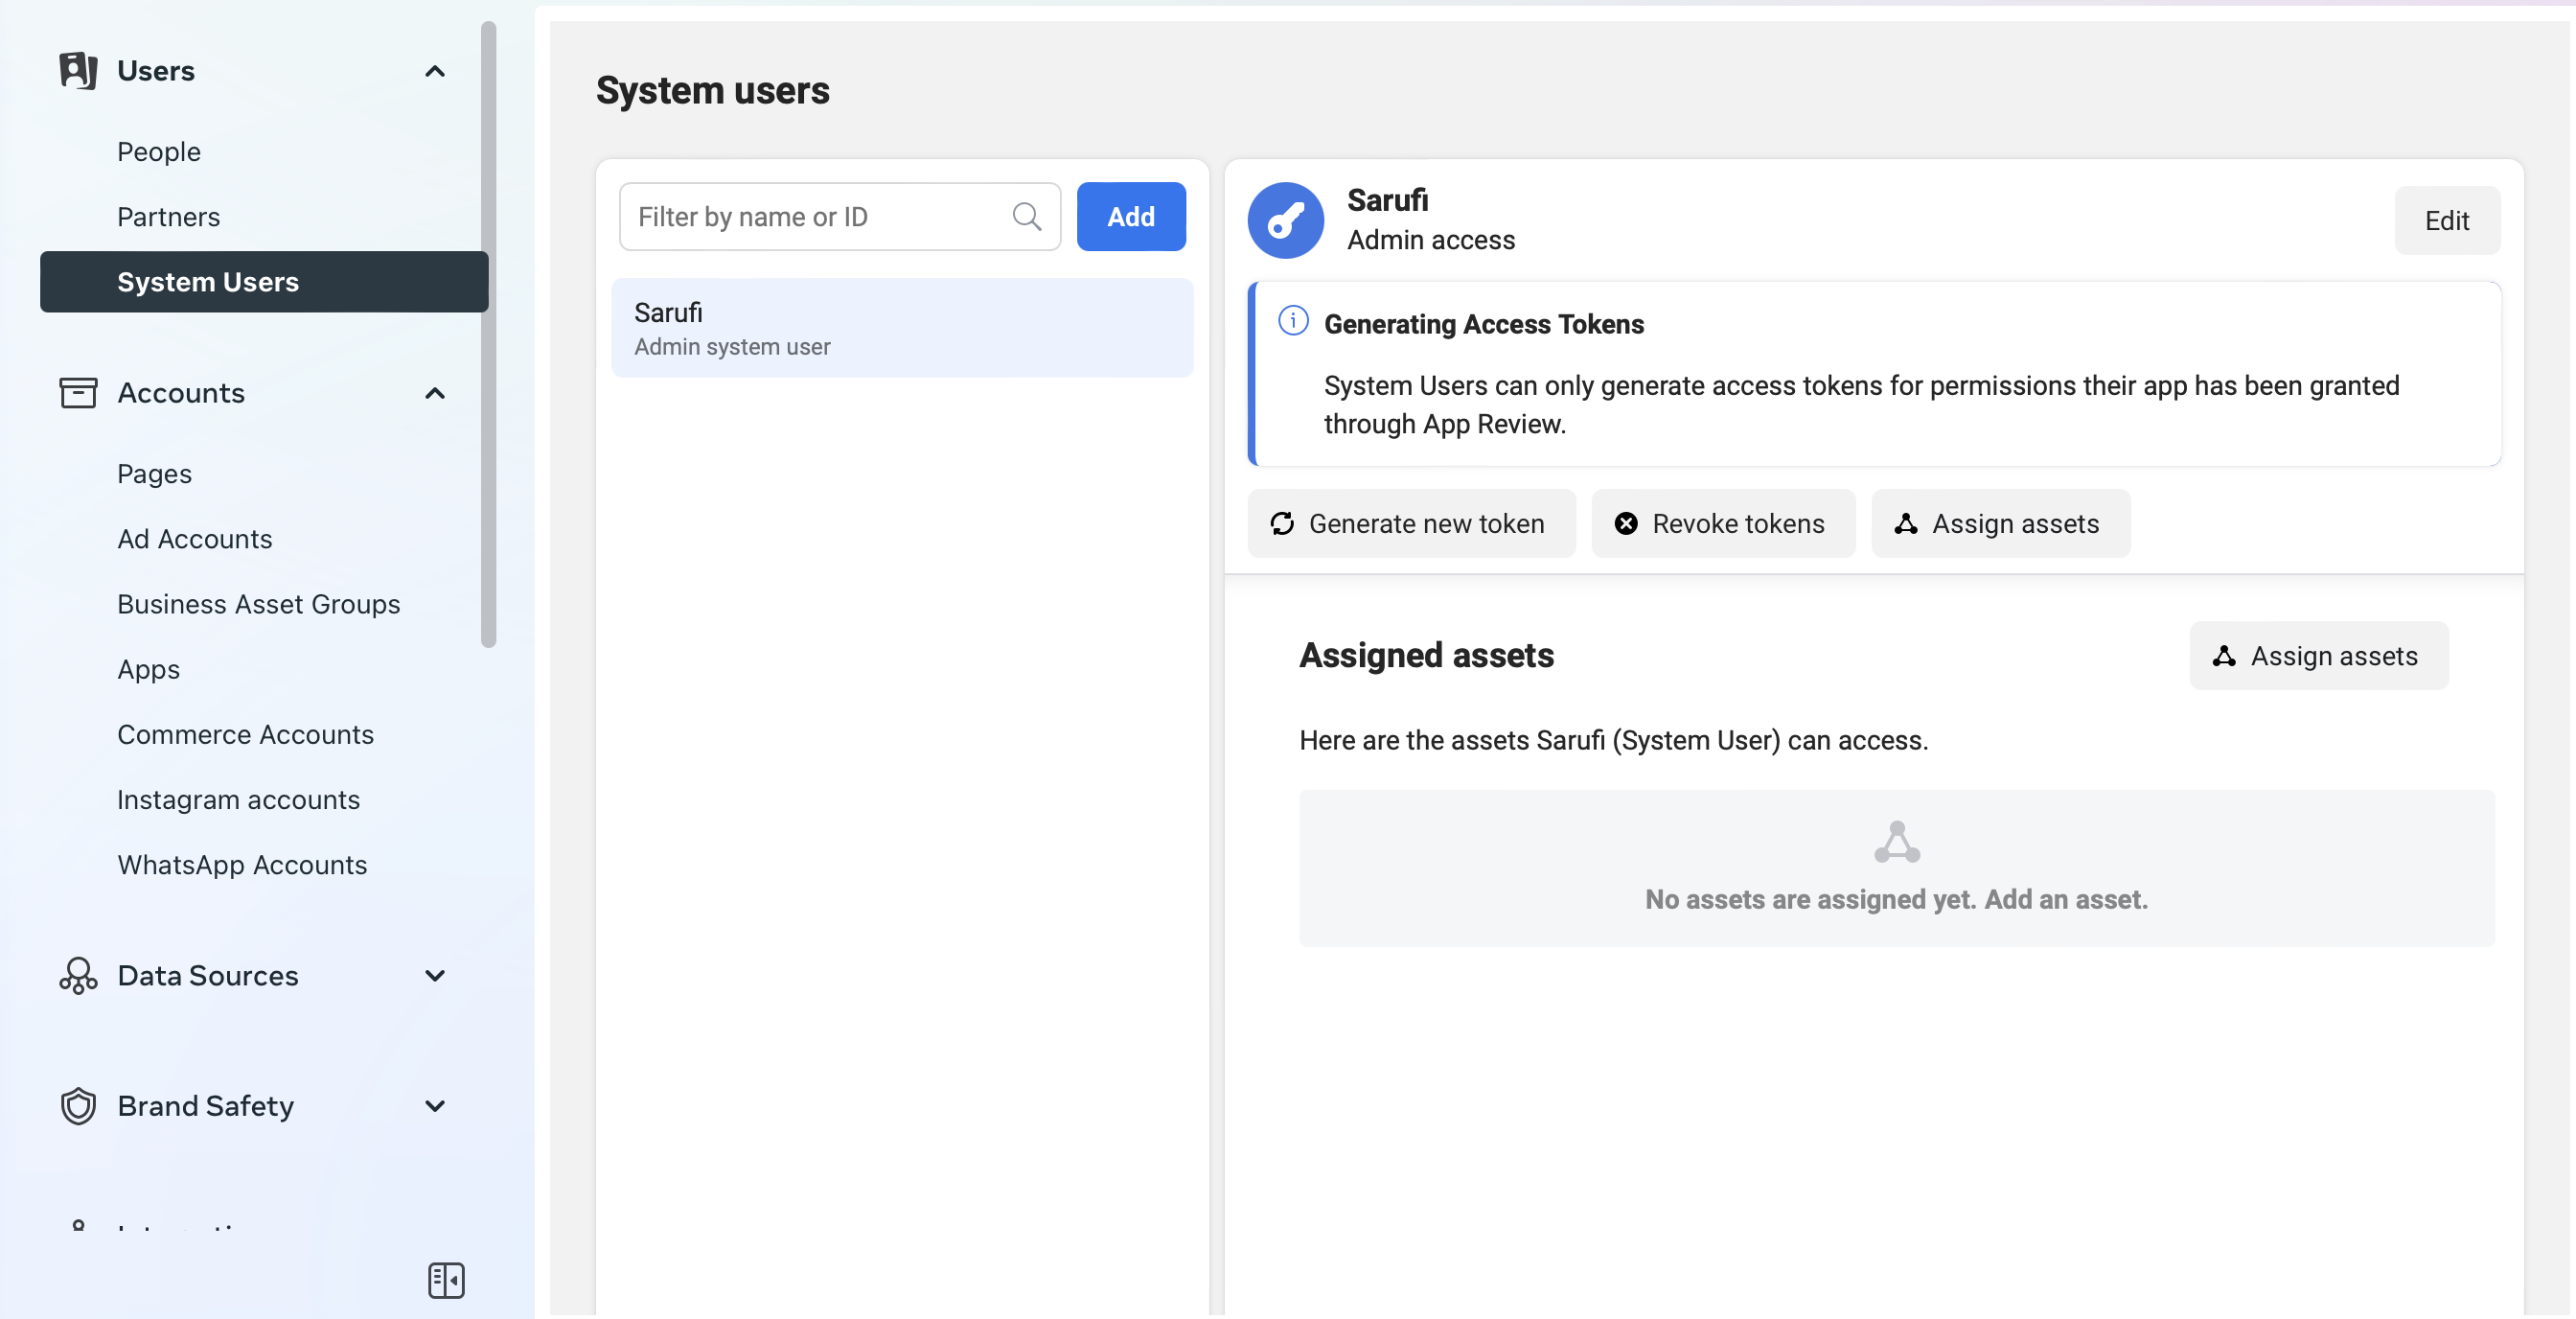
Naviagate to
Apps--> Select your app --> Grant it full control -->Save changes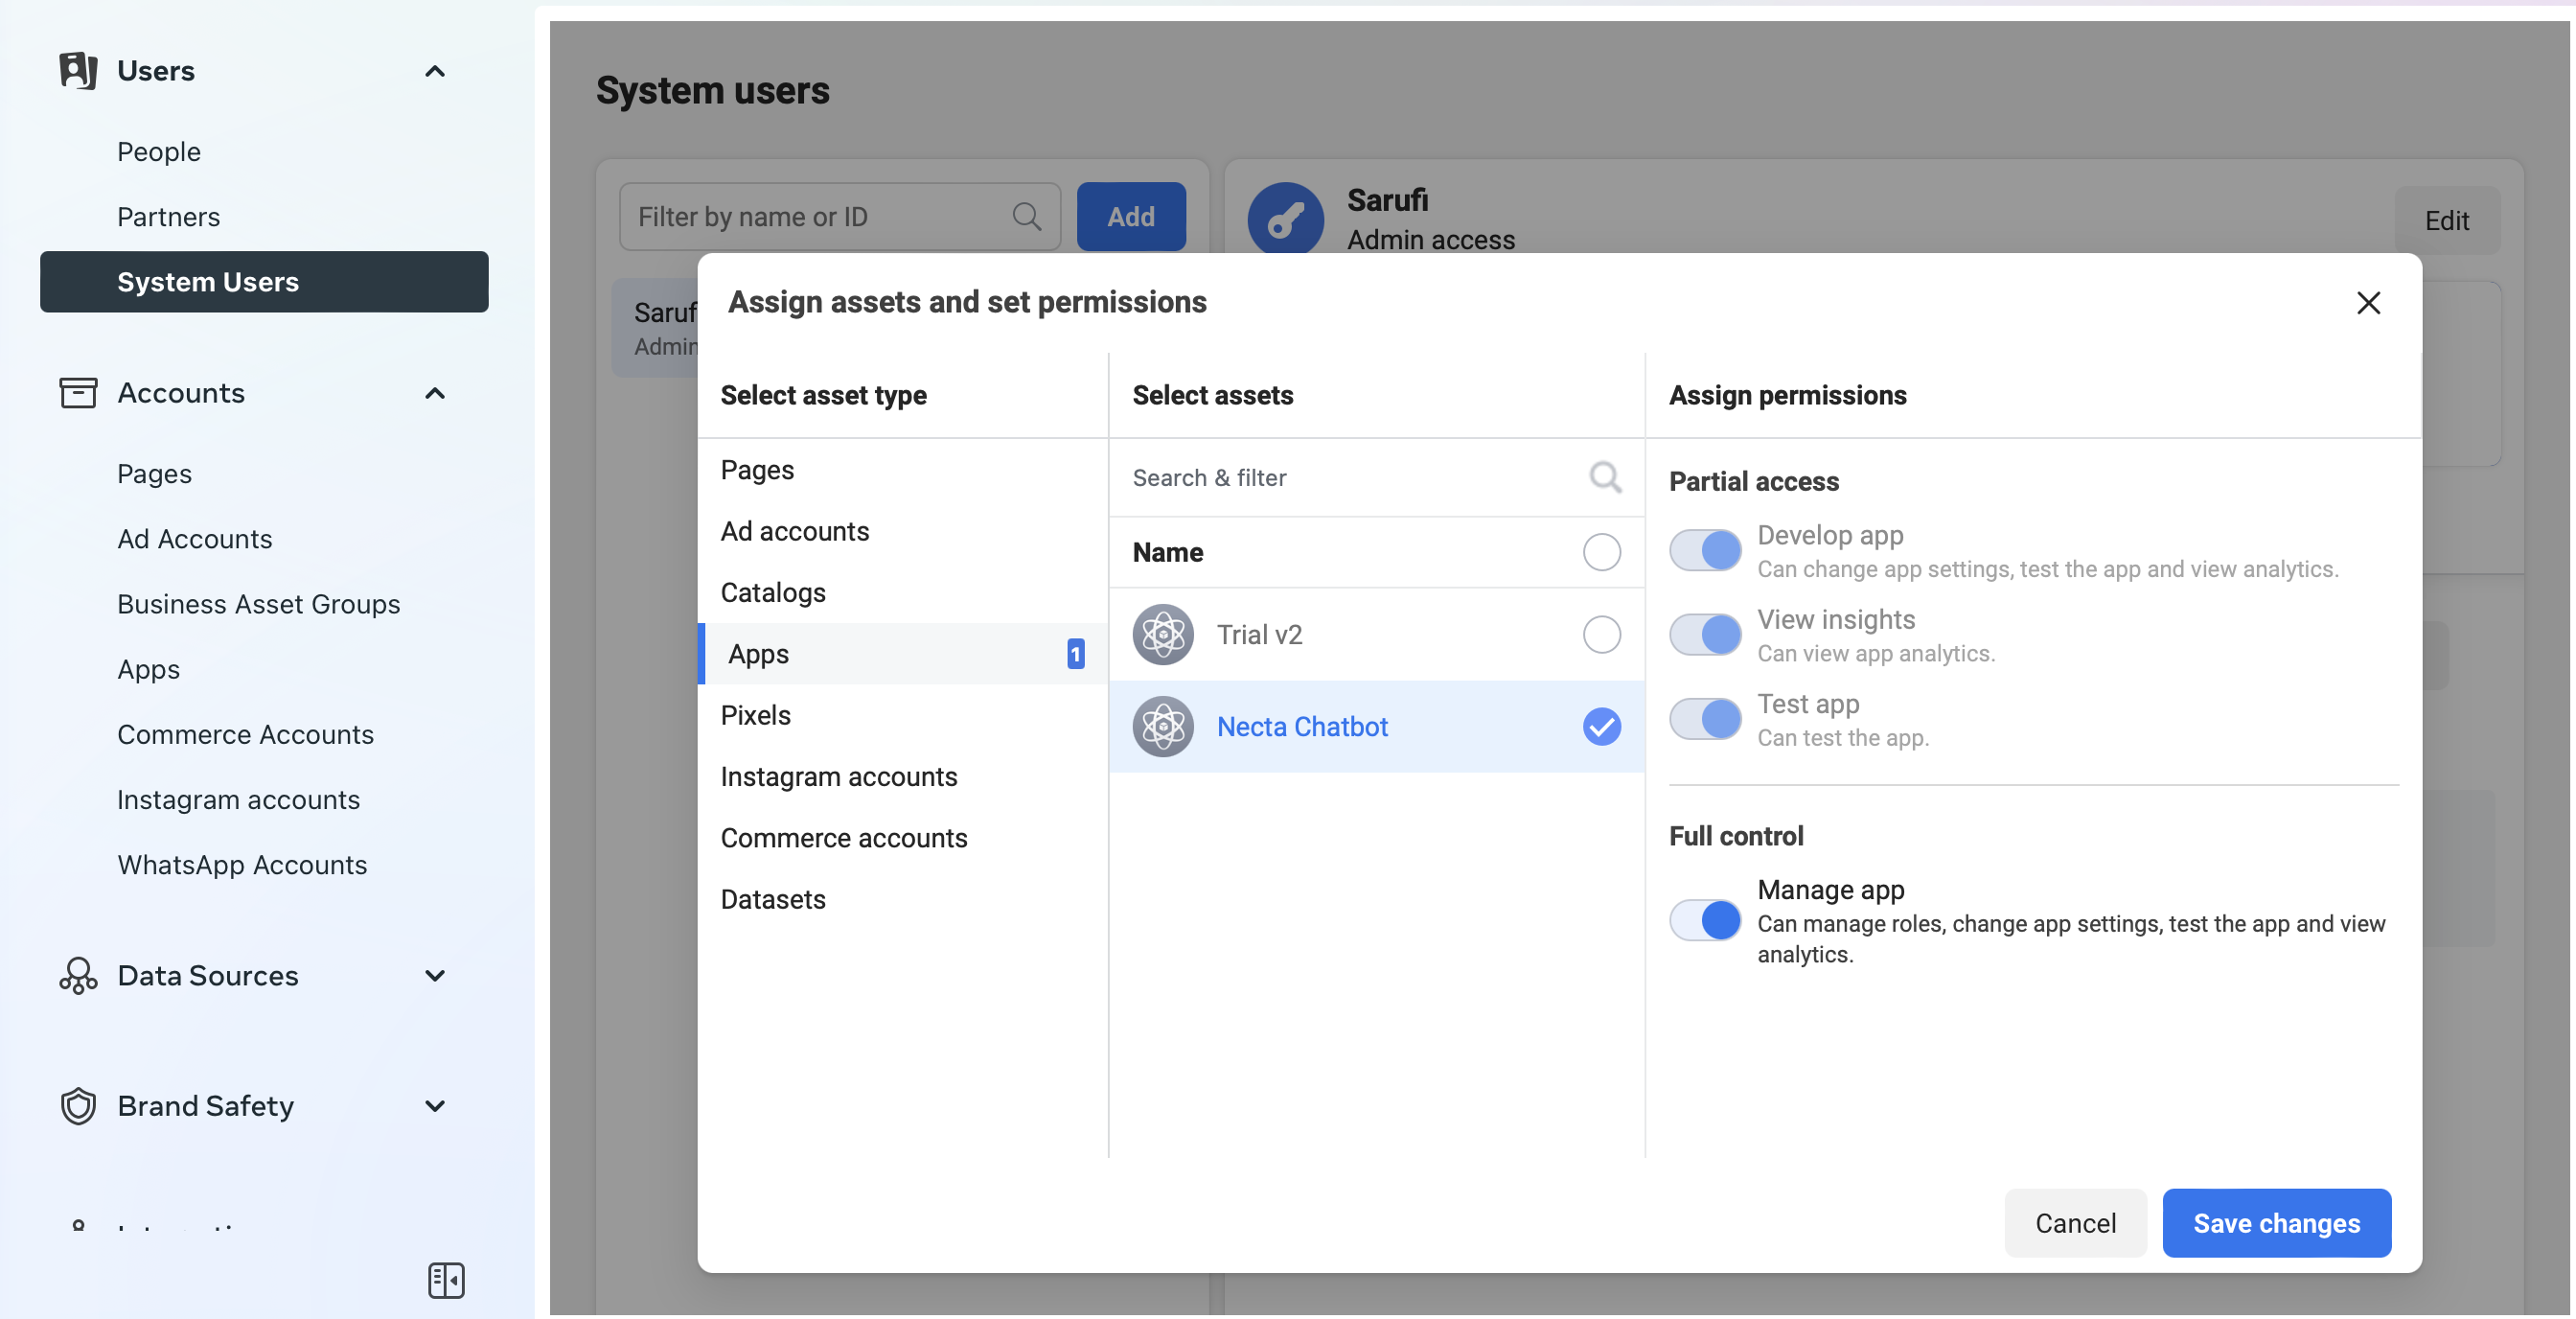
Generate Permanent Access Token
After adding the app to your assets, the next step is to generate a permanent access token. You will have a page that looks like the one below.
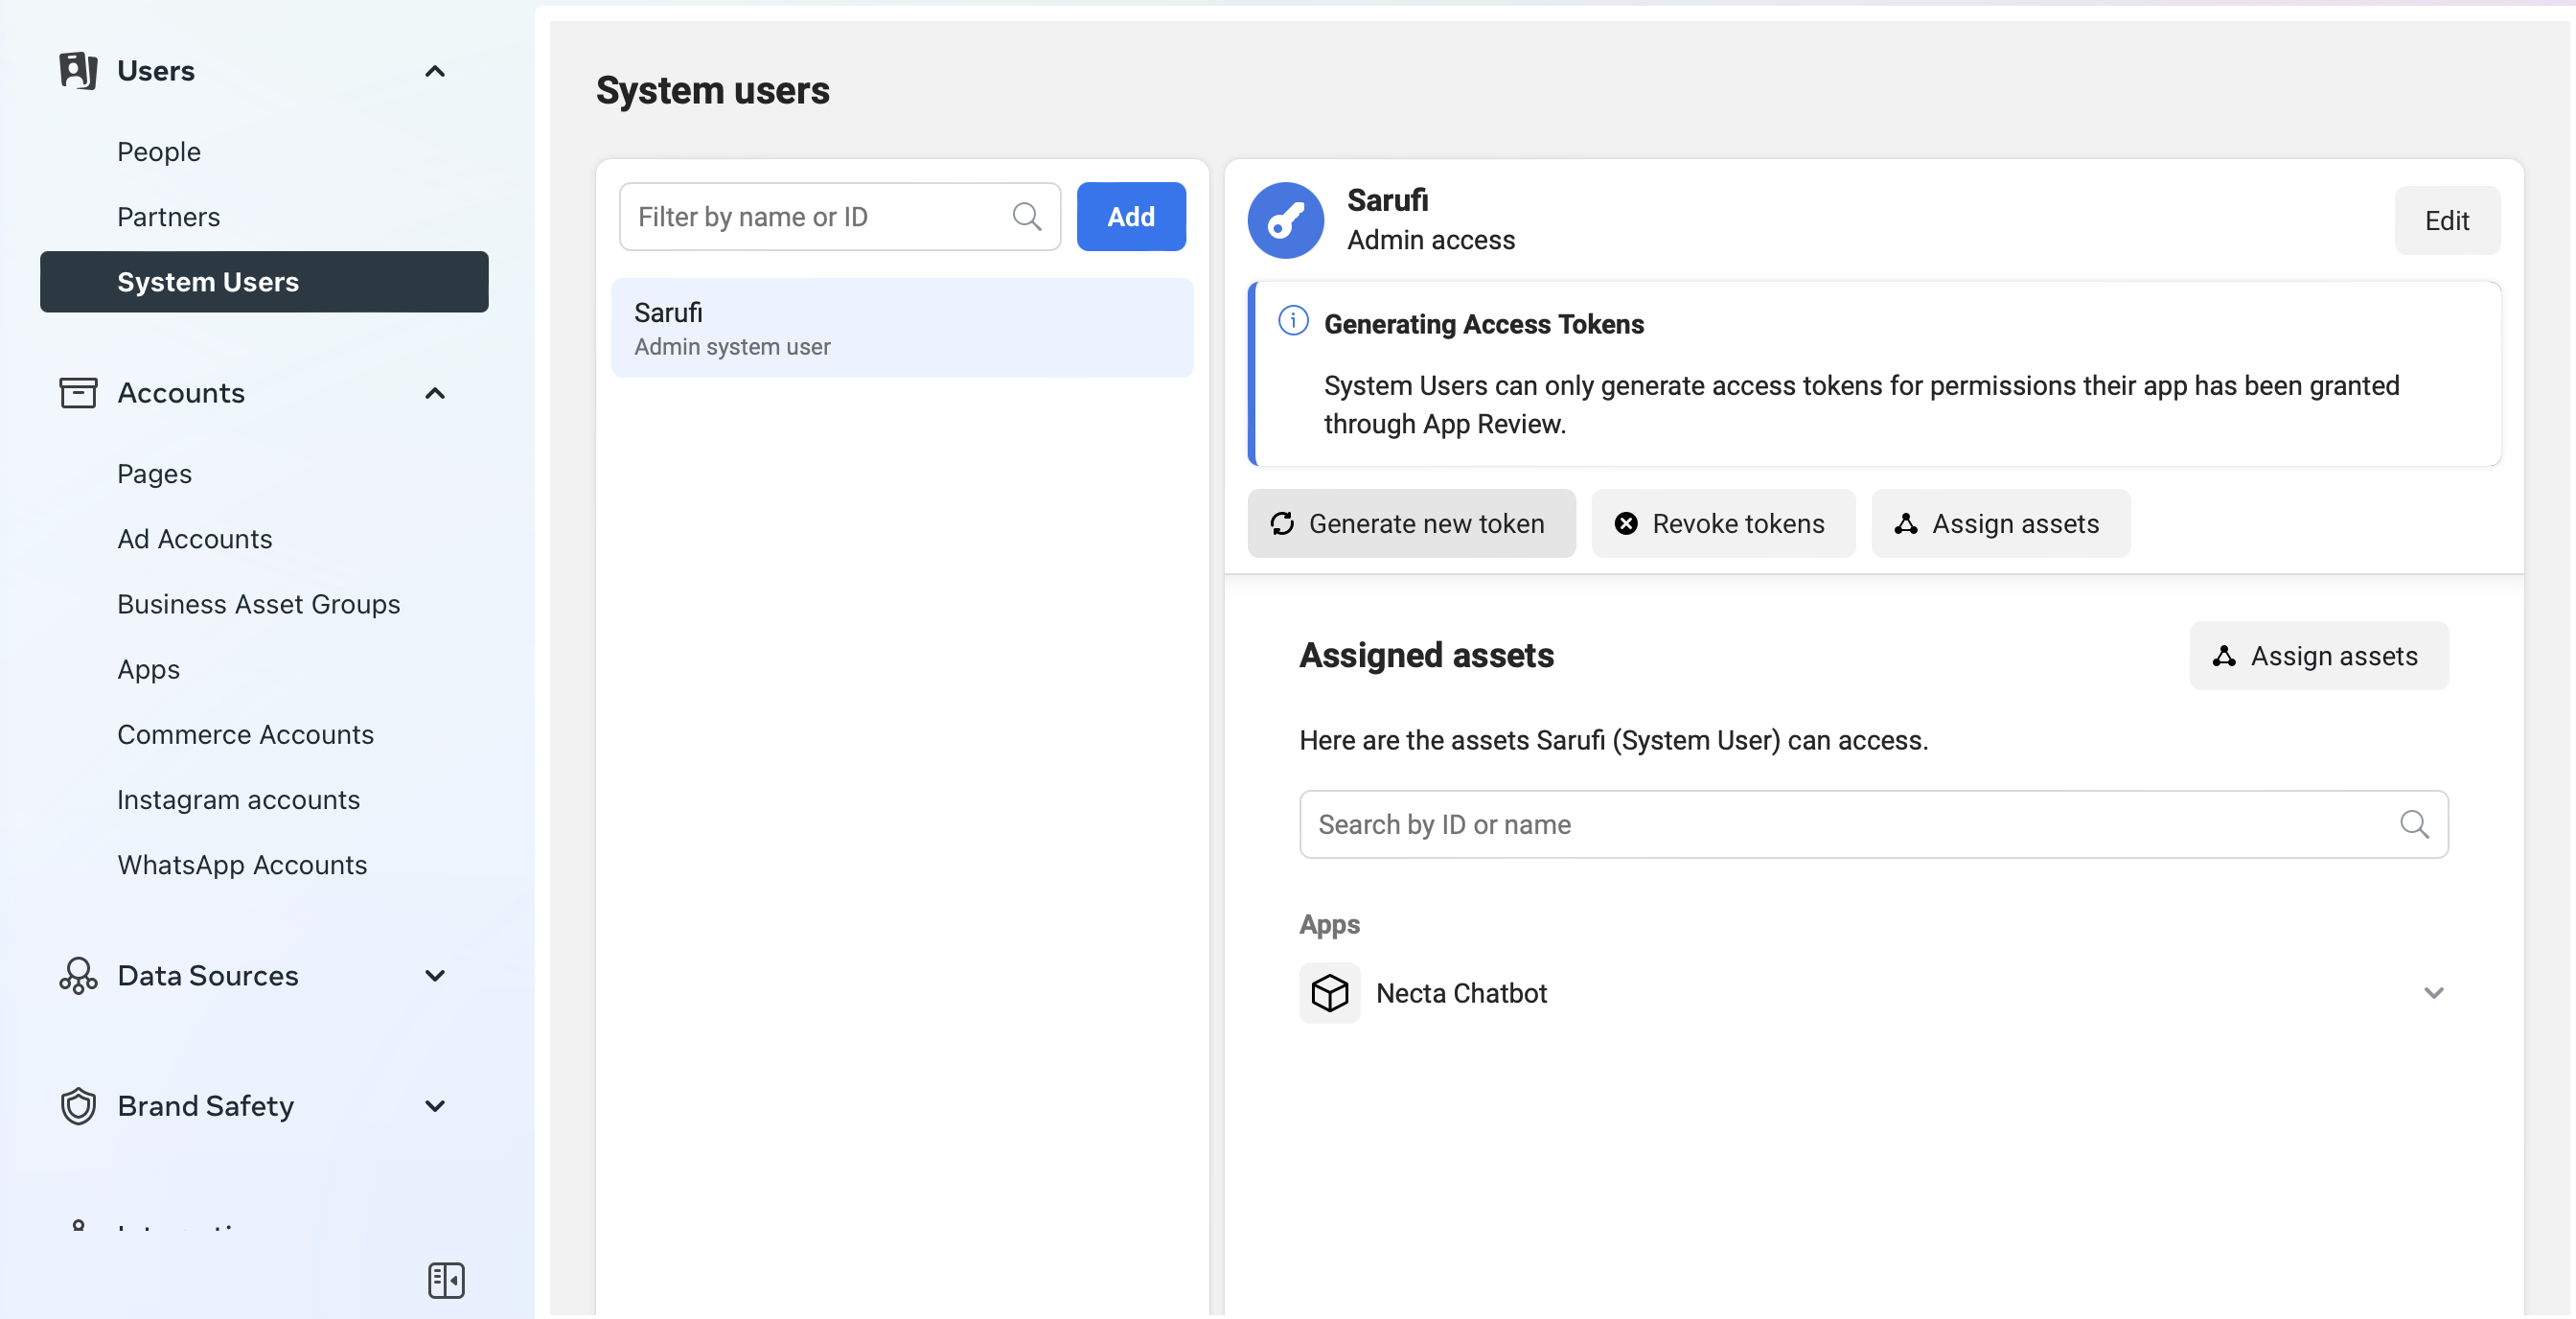
Click on
Generate New Token--> Select an App --> Select your token expiration time.Add Permisions. Uou need to add the
whatsapp_business_managementandwhatsapp_business_messagingpermisions.Click
Generate Token--> Copy the token and save it somewhere safe. You will need it in your script.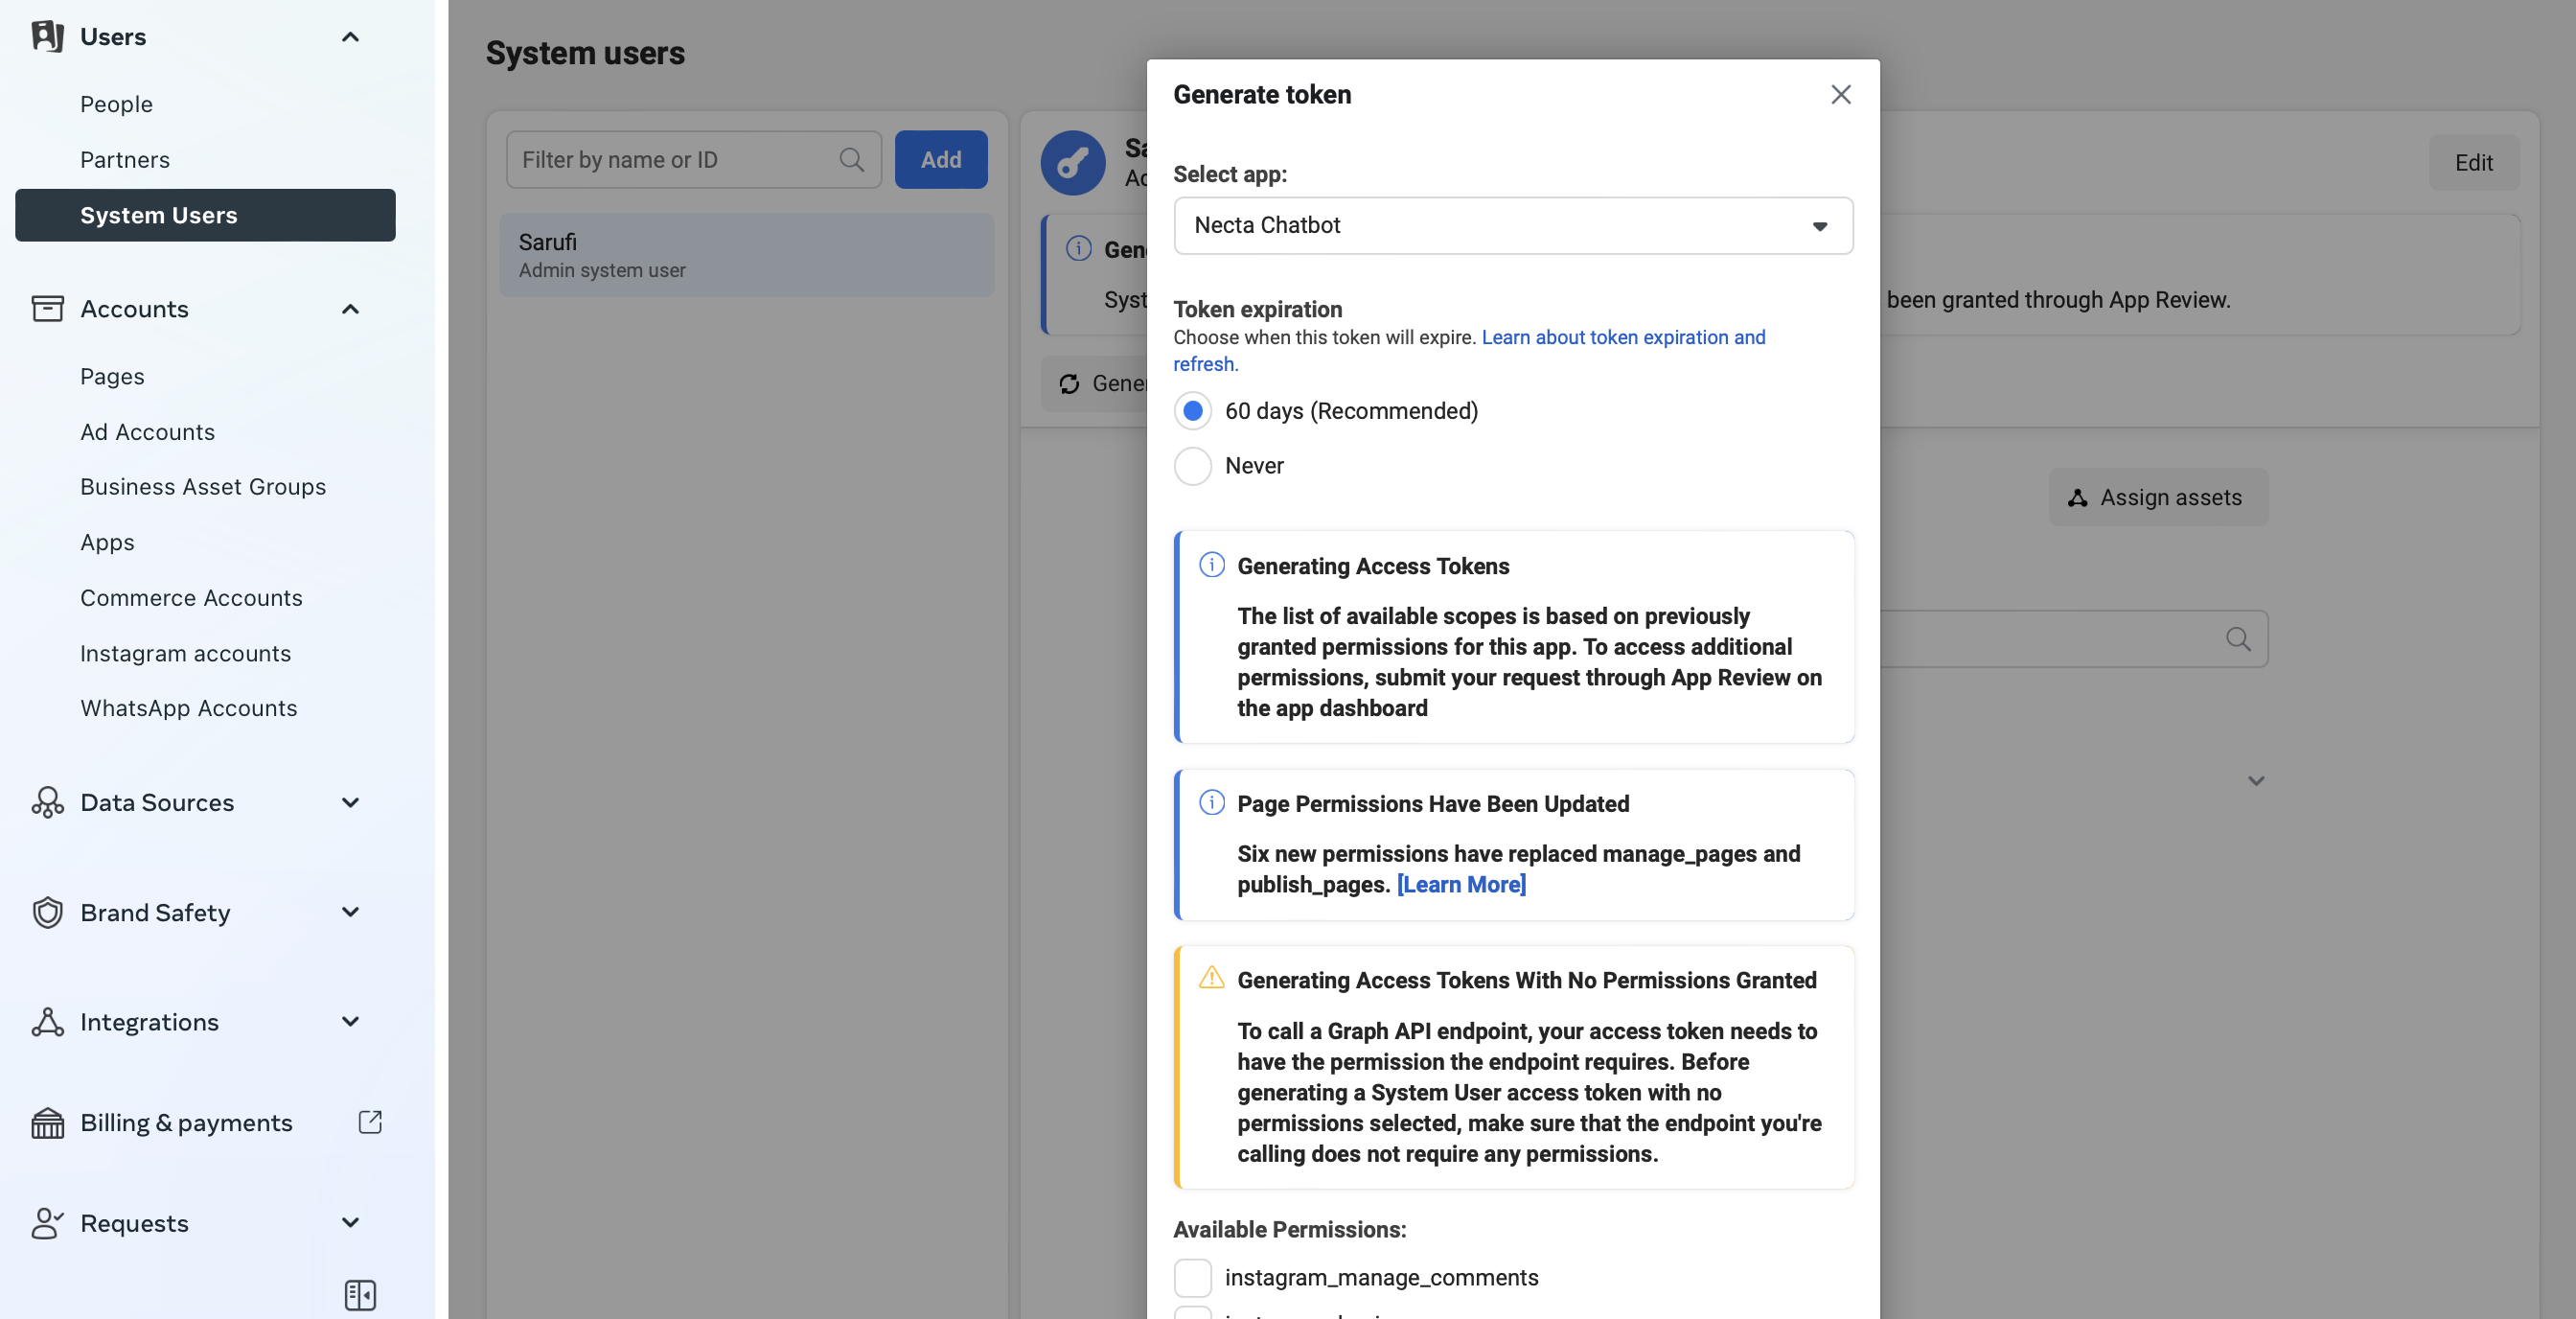
You will have time to view your token. So make sure you copy it and save it somewhere safe. It is only shown once.
Add your production phone number
Do this if you want to use your production phone number. If you want to use your test number, you can skip this step. Follow few steps to step your phone number
Naviagate to your Meta Developer Account --> Your app -->
WhatsApp-->API setup-->Add phone number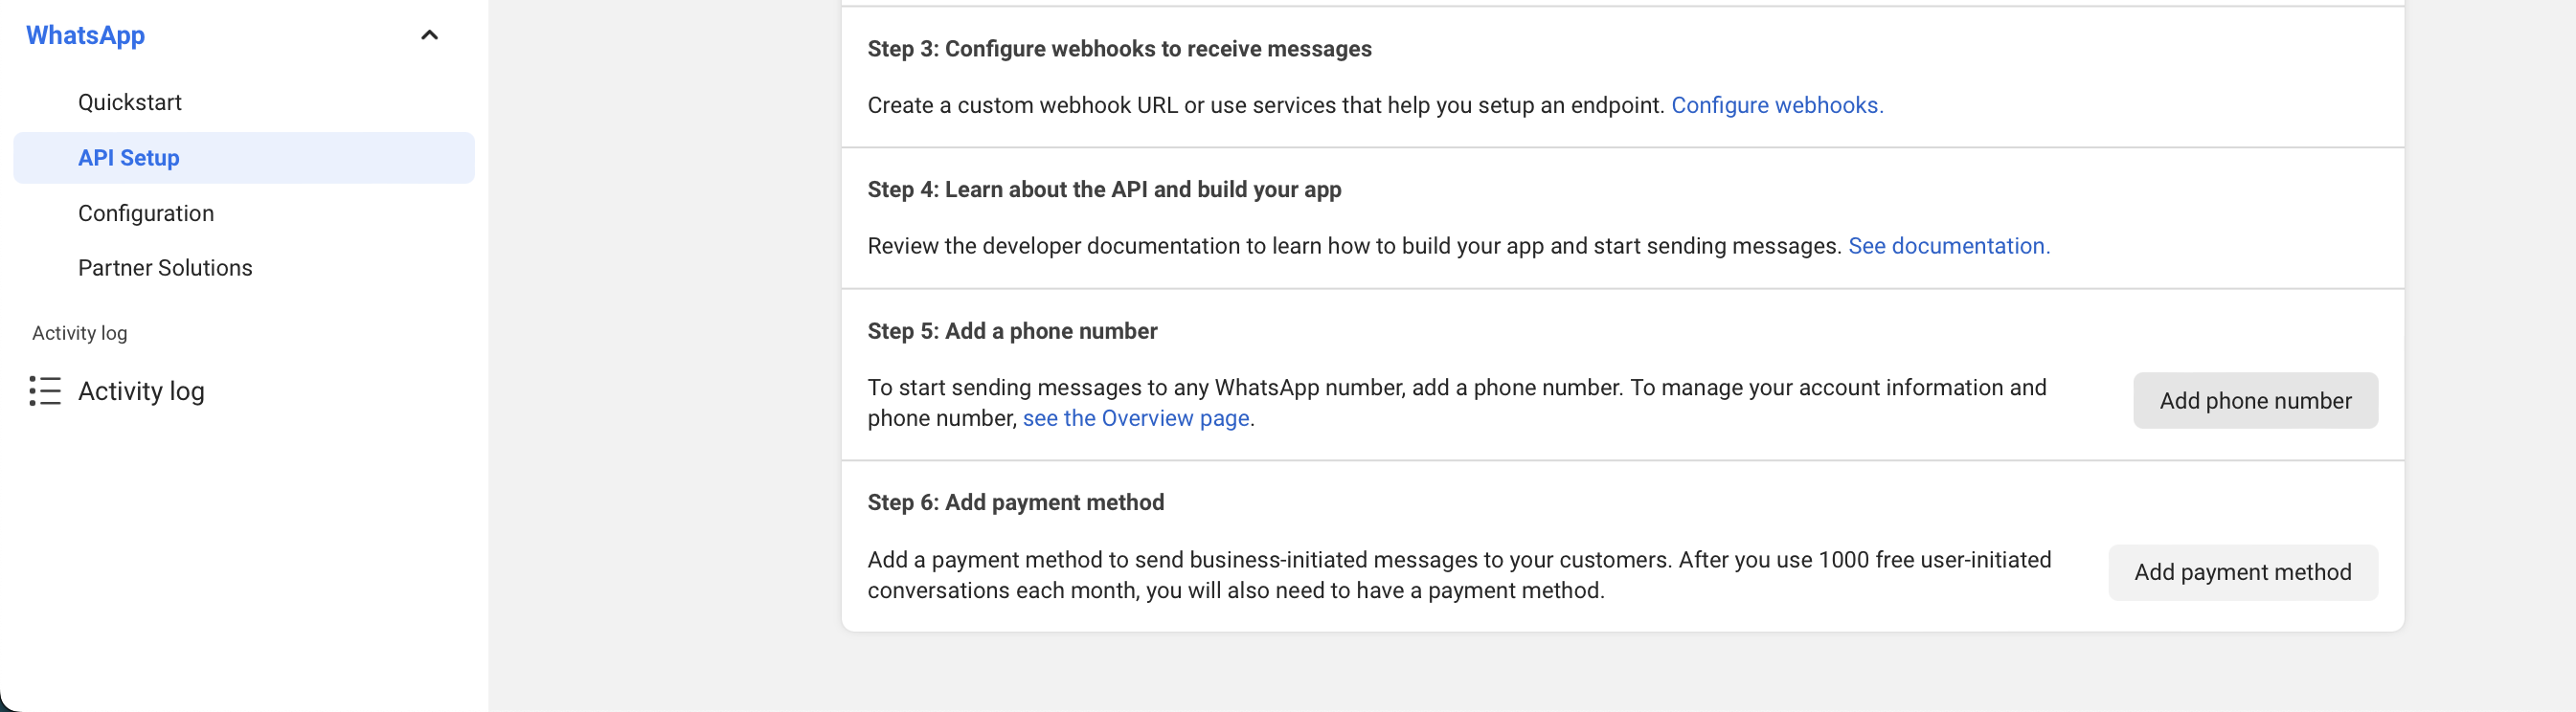
Provide required details, then verify your phone number by entering the code received.
After adding the phone number, scroll up in Meta Developer app dashboard to send and receive section. In the From field, select your phone number.
You will have to copy your
Phone Number IDand generate a permanentaccess tokenthen paste them into Sarufi for deployment.
- Add payment method
You will need to add a payment method to your Meta app. This is required for you to be able to send messages in WhatsApp. You can add a payment method by navigating to your Meta App dashboard --> Products --> WhatsApp --> API setup then follow the instructions provided.
Finalizing Whatsapp setup
In this section, we are going to finalize our WhatsApp setup. We are going to setup a webhook and subscribe to message topic.
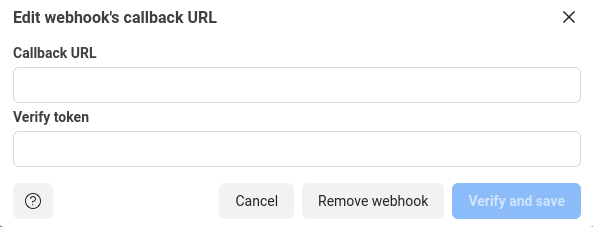
Setting up a WhatsApp webhook
Navigate to your WhatsApp cloud account -->
Configuration--> (Webhook) edit --> paste the URL into the Callback URL field.You will also need a verification token. Copy the token from either the dashboard or your script's environment variables --> paste into verify token in your whatsapp cloud --> verify and save.
Webhook field subscription
After verifing and saving your WhatsApp webook, navigate to webhook fields --> click
manageto subscribe to themessagetopic.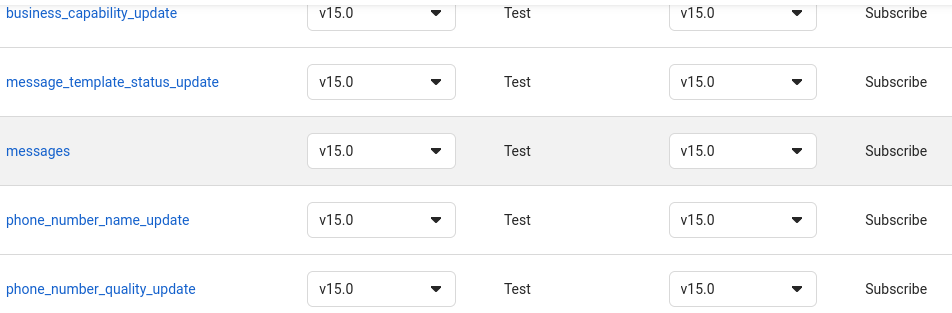
Test your WhatsApp chatbot
Let's finish by testing our bot in WhatsApp.
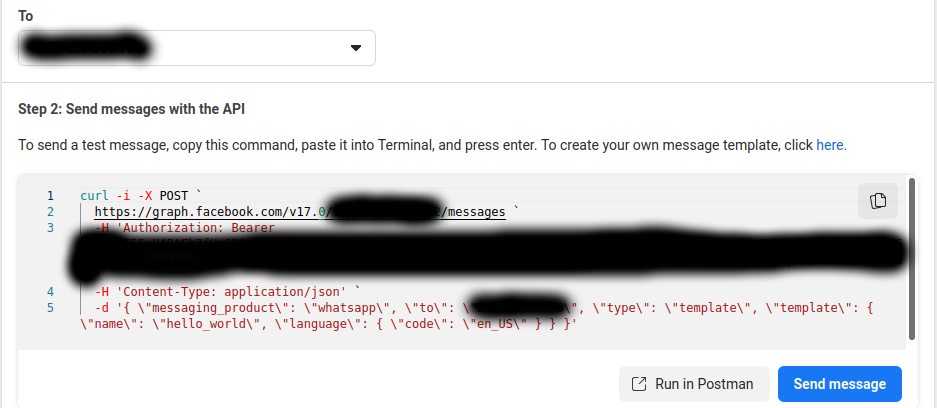
Navigate to your WhatsApp cloud account >> API Setup >> scroll down to a field named To. Click manage phone number to add your phone number. Follow the instructions until the phone number is added.
Click send message to start testing your bot. You will receive a message from your test number which your will use in testing your bot.
You can test WhatsApp by sending a message to your bot.
Lets test our PizzaBot
Showcasing the PizzaBot we have been working on, here are the responses of the bot deployed in WhatsApp.
What you learned
In this tutorial, you learned how to connect Sarufi to the WhatsApp Cloud API. You also learned how to configure and run WhatsApp.