Sarufi Dashboard
The need to develop chatbots in a faster and convinient way, has brought up a cool tool with sarufi. Sarufi has interactive interface to get you started with your chatbot idea.
Developing your chatbot does not have to be time consumimg and causing headaches. With the UI(User Interface) in place, you will be able to use the full power of your idea.
To get working with the dashboard requires no prior knowledge of programming as sarufi does all the heavy stuffs for you. All needed is your idea to get started.
Dashboard Features
With a dashboard, you can do a lot in a quick way. Lets look at the key features of the dashboard.
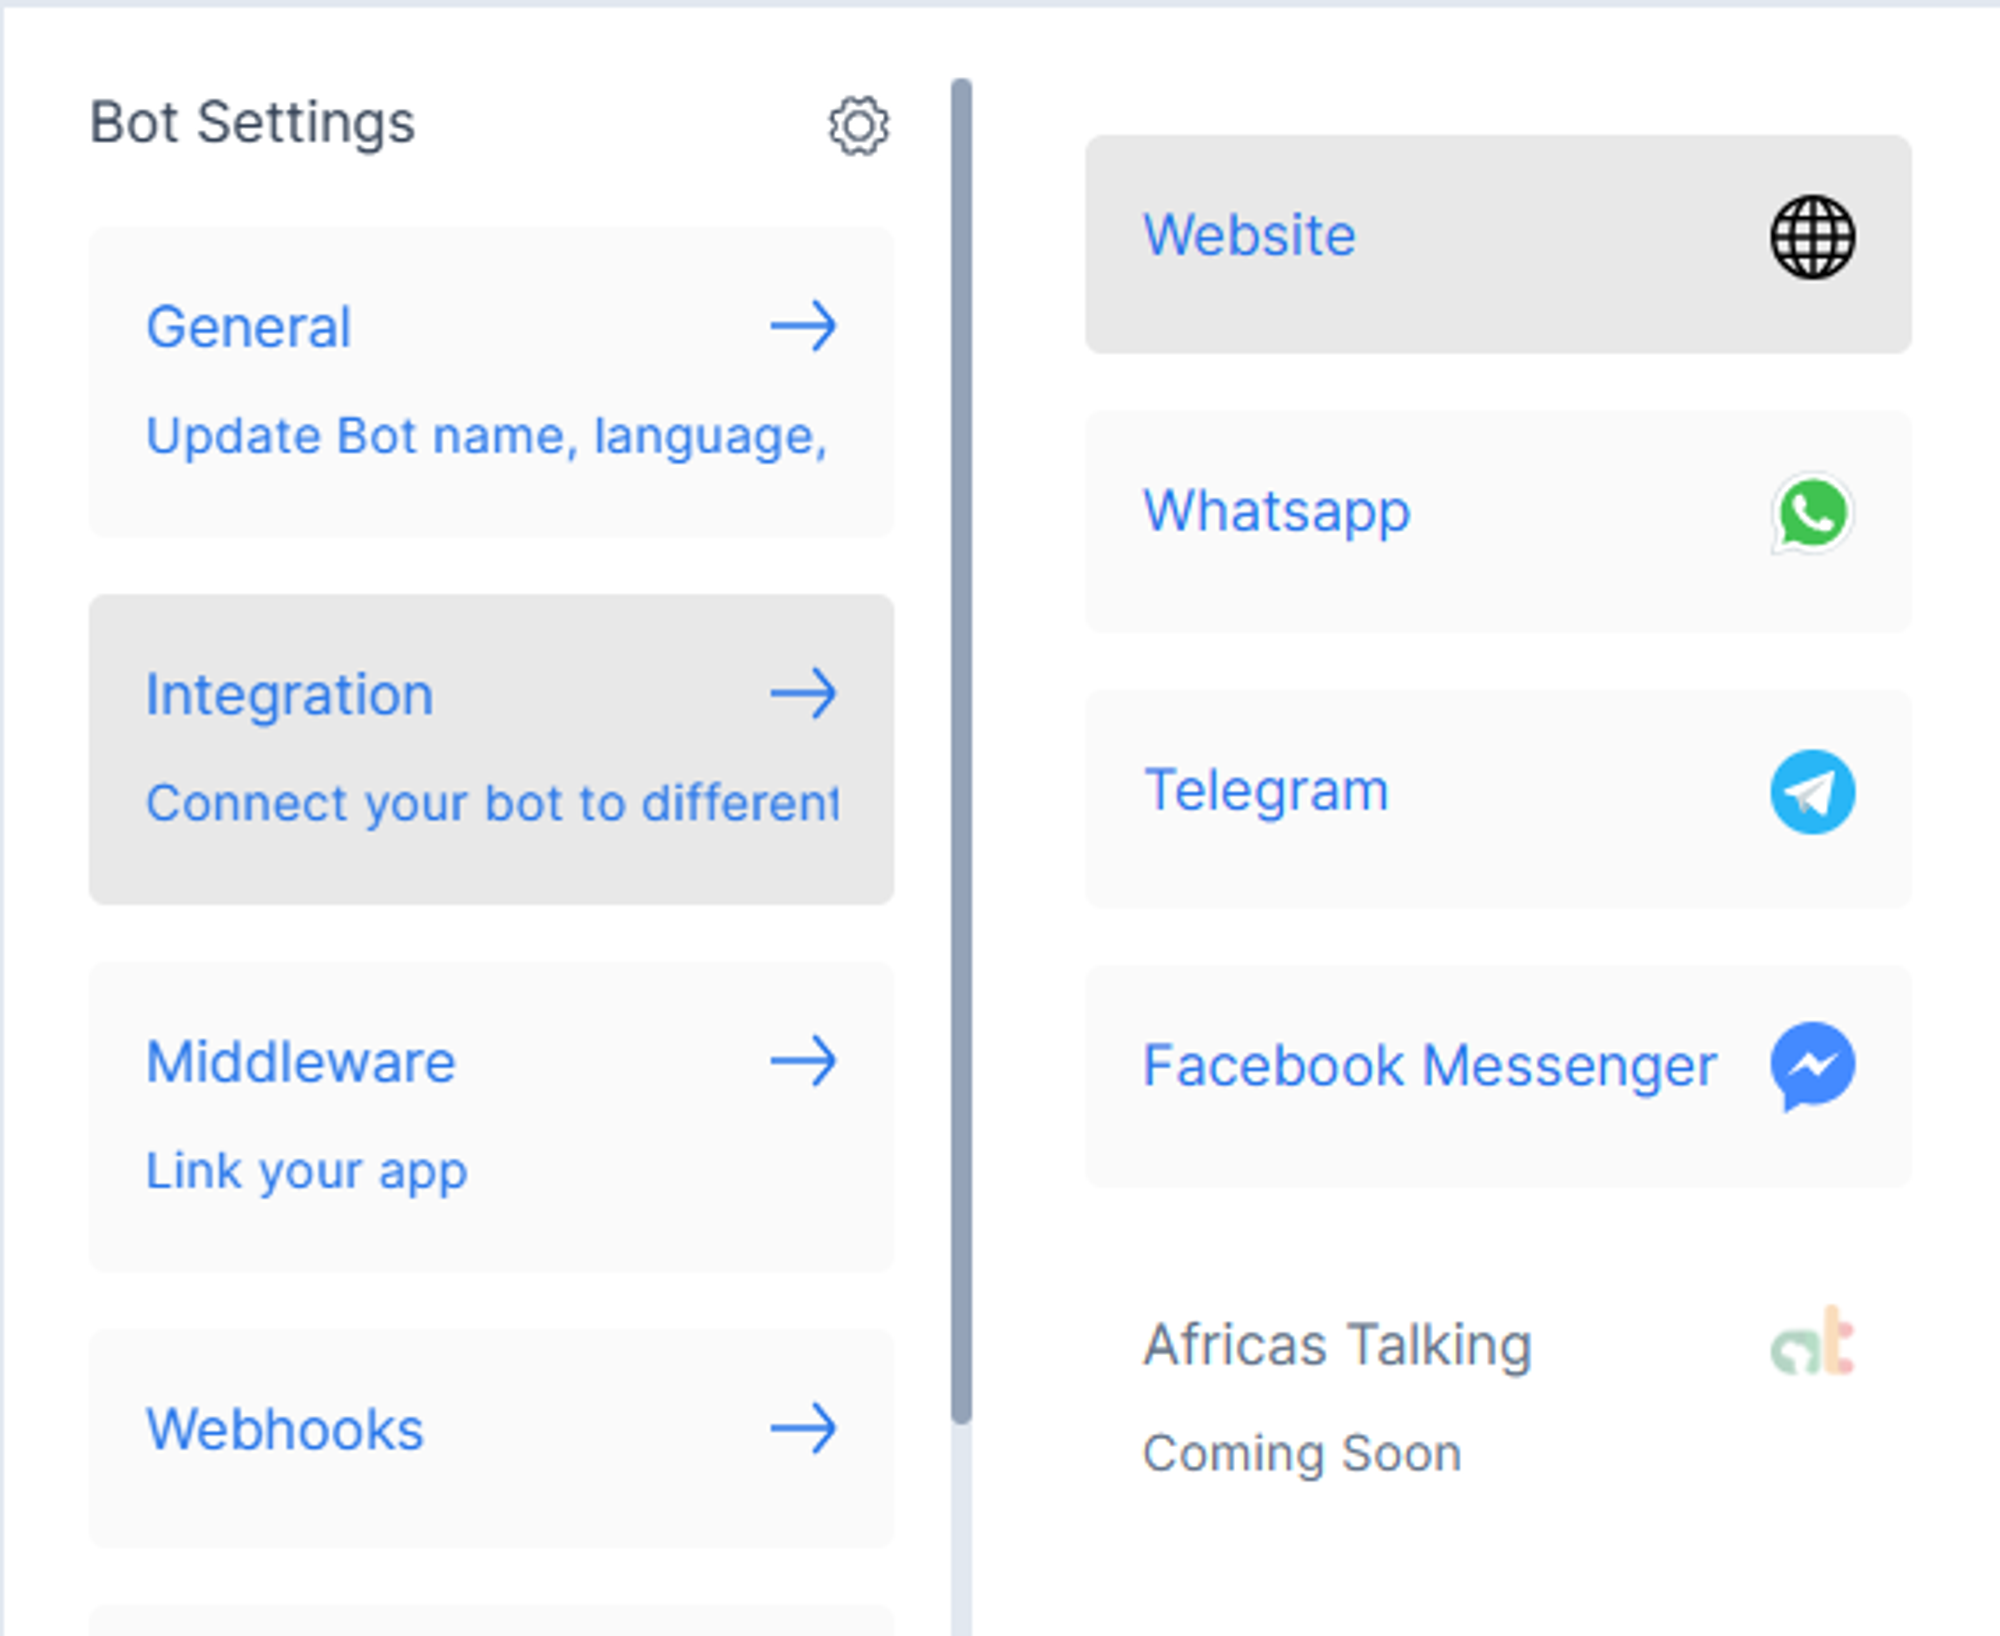
Channels Integration
Sarufi dashboard enables you to integrate your chatbot with different messaging platforms such as Whatsapp, telegram, facebook messenger and many more to come. This will enable you to reach your customers on their favorite messaging platform. You can read more on channels integration
You just need to navigate to settings of your chatbot then Integrations
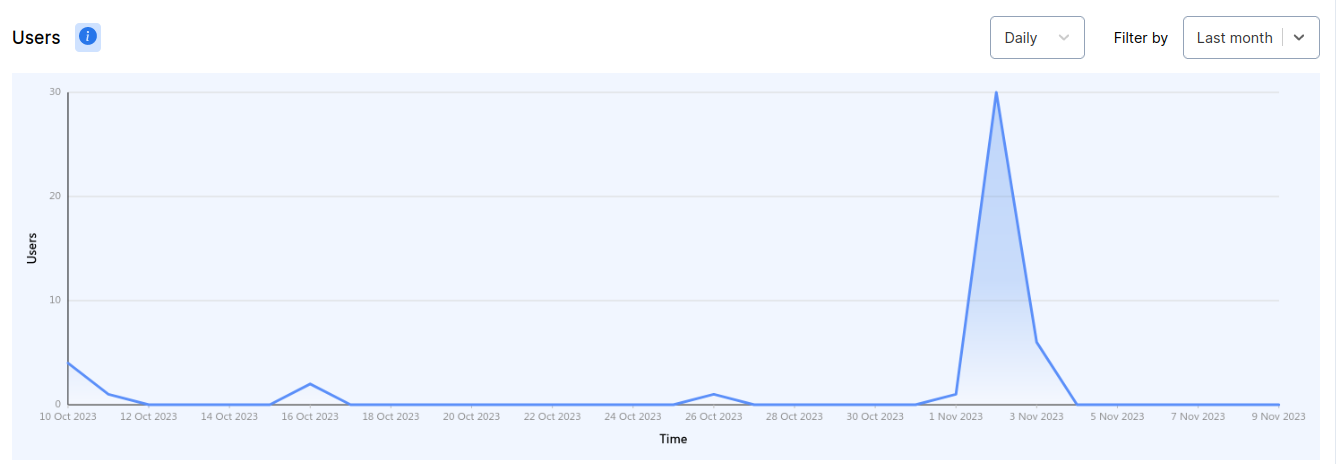
Chabot Analytics
With the dashboard, you will be able to see how your chatbot is performing. You will be able to see the number of users, messages sent and received, and many more. This is handy as you will be able to see how your chatbot is performing and make some improvements.
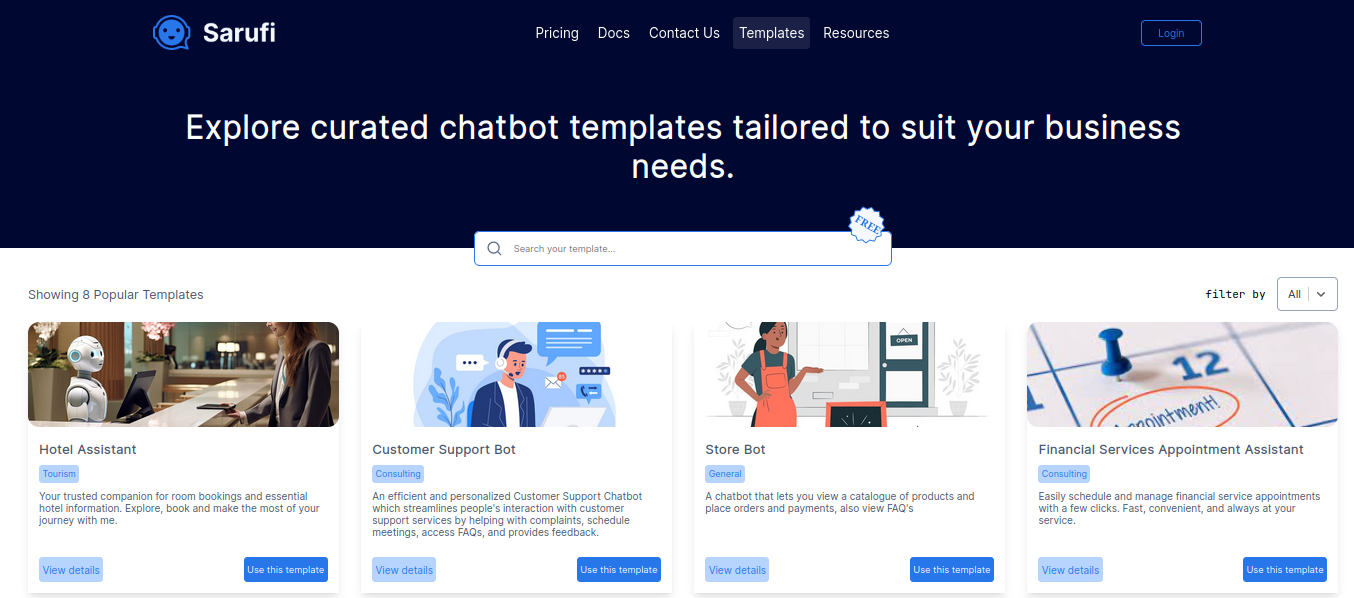
Chatbot as Template
With the dashboard, you can create a chatbot and share it to be used as template. This will enable other developers to use your chatbot as a starting point for their chatbot idea.
Building a chatbot from scratch can be a daunting task. That's why we have created a few templates to help you get started quickly. You can use these templates to create a chatbot for your business in a few minutes. Templates will help you to get started quickly and you can customize them as per your needs.
How to use a template?
To use a template, you need to follow these steps:
Go to the Templates page.
Select a template that you want to use. Click View Details button to view the details of the template.
Try out the demo of the template by clicking Live chat. You can also view the screenshots and gif of the template.
Click on the Use Template button if you want to use the template.
You will be required to log in into your Sarufi account. If you don't have an account, you can create one for free.
You can edit the chatbot as per your needs.
Its that simple! You can create a chatbot for your business in a few minutes.
How to create a template?
To create a template, you need to follow these steps:
Log in into your Sarufi account.
Create a chatbot. The chatbot created should not have any ambiguity in the flow. It should be a complete chatbot.
Test out your chatbot. Make sure that it is working as expected.
Go to the Settings page.
Click on the Export Bot to Template button.
You will be required to fill in all important details about your template. Provide clear and concise information about your template's fuctionalities/features.
On top of that, you will be required to provide a at least 4 screenshots of your chatbot and a gif of conversations . Make sure that you provide screenshots of all important parts of your chatbot.
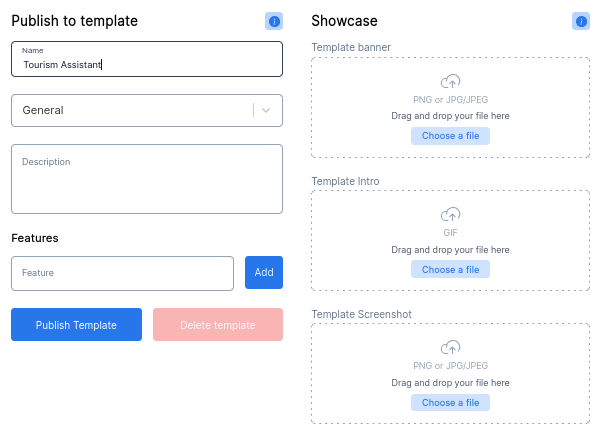
Once you have filled in all the details, click on the Publish button. Your template will be published on the Sarufi marketplace.
Available Templates
Currently, we have templates coveing areas around restaurants, hotels, ecommerce, customer support, lead generation and survey. We will be adding more templates in the future.
You just need to develop your chatbot and provide some information about it. Then you can share it to the community. Visit sarufi templates section to see what other developers have created.
Web Plugin
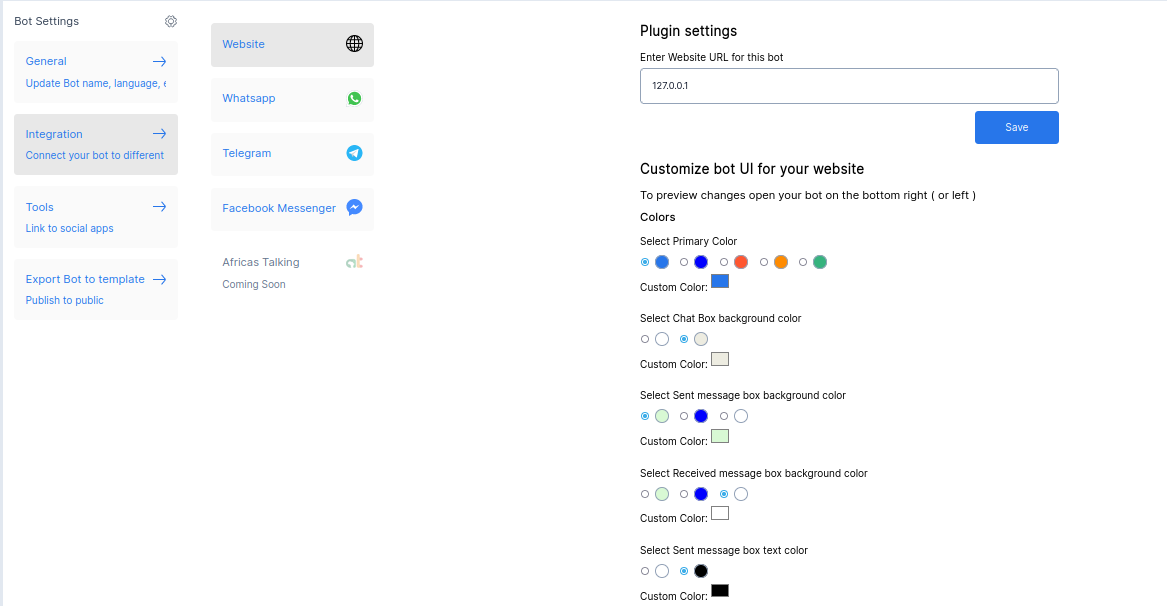
After developing your chatbot using sarufi, you need to let it get into use in the real world situation. The easiest way can be integrating you bot with your website.
With the dashboard, web integration is achieved within few seconds. All you need to do is to specify your website URL and then easily customize the chat widget however you want theme/color/font/title and etc.
You will have a code snippet that you paste in HTML page or React/NextJS App. so easy 🚀, you now have the bot for your site.
You can see one of the bot integrated into web at UDICTI
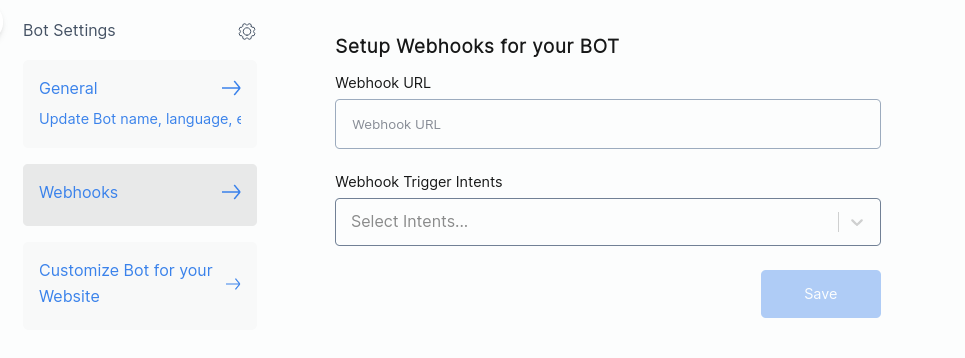
Webhook Integration
With support of webhook, your bot will have ability to communicate with third-party APIs (payment gateway, CRM, etc) at any point of a conversation.
All you have to do is specify which states should trigger the webhook.
You can read more on webhooks at sarufi webhook integration
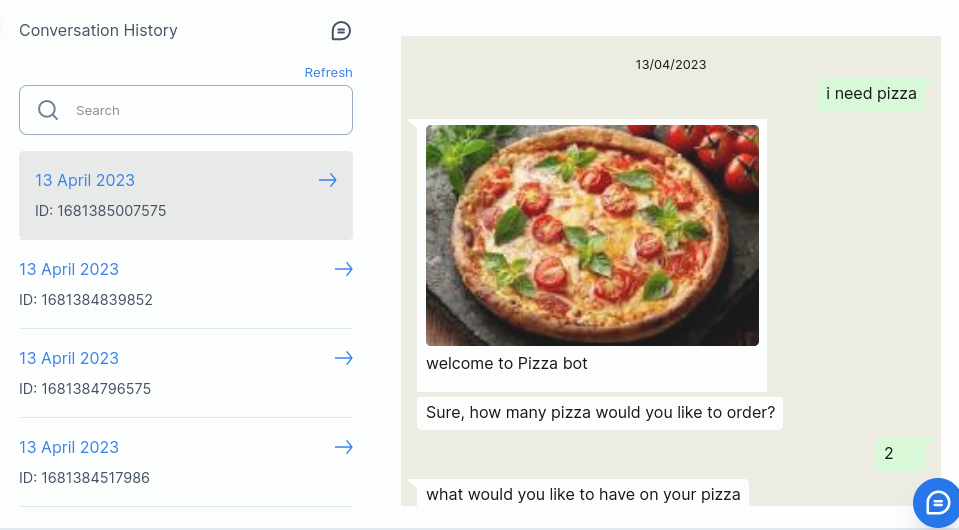
Conversation History
As your bot gets to interact with users, it needs to be updated on the cases it was never trained on. How can we do this then, you might be asking. The key here is using conversation data to improve our chatbot responses and coverage.
Chatbot live test
During development of anything, you would not like to move on without testing the current state of your project. Here comes a cool chatbot live-test feature. This will enable you eliminate any guesswork and ensures that the chatbot you're developing will work as intended
Media support
Chatbot without some illustration images or videos may not be customer engaging. The dashboard removes the barrier by allowing you to use media such as:-
- images
- videos
- documents
- stickers
This will also work exactly the same way deployed to messaging platforms like WhatsApp, Telegram or your website chat widget.

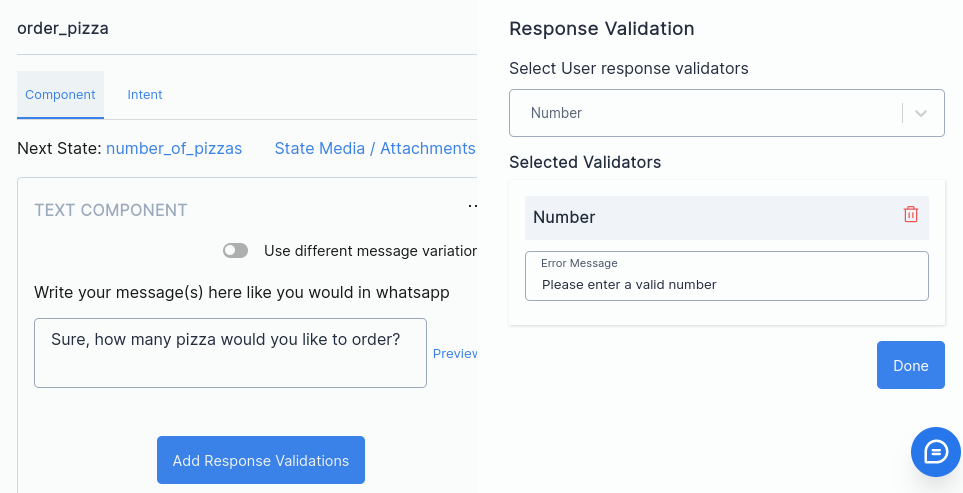
Response validation
In case you feel the need to verify conversation responses to fit what you wanted whether it be a mobile number, email, or date.
The new dashboard got you covered with our response validation feature. You can use default validators or even write your custom validator using regex
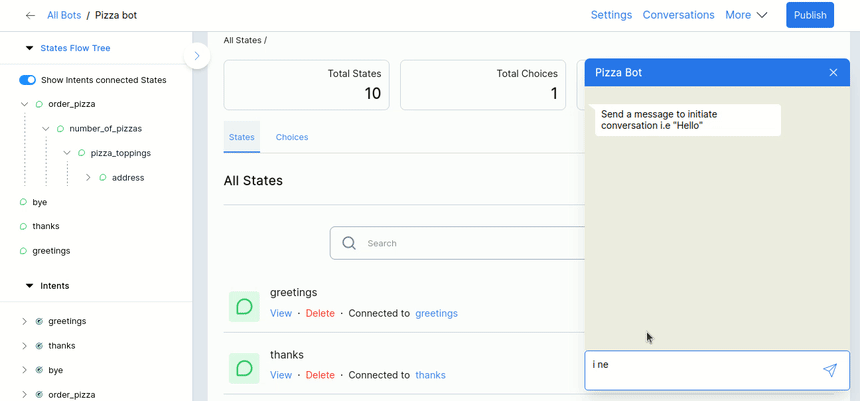
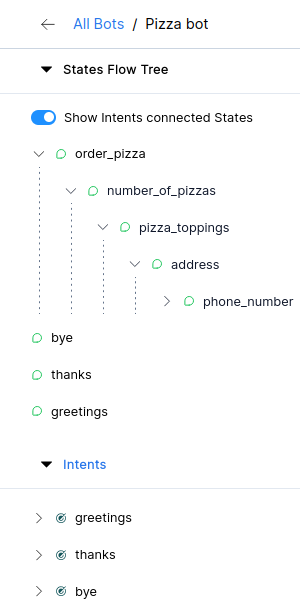
View dialog Flow tree
With the UI, you will be able to view your bot's flow tree. This makes the development process more convient as you can visualize the connected intents and flows.
Start using Dashboard
To get started with this interface, you will need to sign up with sarufi
You can login 🔓 using either Google or Github account.
Create a Bot
After logging in, navigate to the Dashboard by clicking Dashboard tab. Then you can now proceed with creating our new bot. In creating a bot, you will have two options available:- creating a bot from scratch and creating a bot using knowledge base.

Create chatbot from scratch
Lets start with drafting our bot from scratch. Building a chatbot from scratch enables us to tailor the way the bot will handle the conversations flow. This options is great for our pizza bot.
Click Create a New Bot Button >> Create from scratch, then fill important information about the your bot.
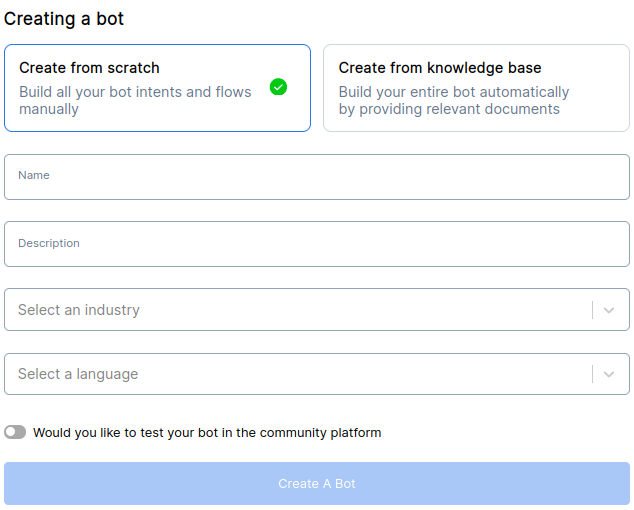
Here are some things to take note:
Language selection
With language selection(currently English and Swahili), you can choose any base language for your bot. Your bot will be created with some default intents and flows that you can look at and make some modifications.
Community visibility
We provide sarufi Community playground for developer to showcase what they have been able to create using Sarufi. The toogle button lets you decide to make your chatbot publically available at sarufi Community for people to test.
Lets leave it off as we can share our bot once its completely finished.
Threshold settings
Lets talk a bit more about threshold. A threshold indicates how correct a bot's model was able to evaluate user intent(s) and determine the flow. The threshold is a value between 0 and 1.
Lets assume that the bot has confidence level of about 0.345 on certain user massage. If we set bot's threshold to 0.4, it will not be able to pick up the intent. So we introduce a fallback message as a fallback message will be the response in case a model evaluates user intent below the threshold set.
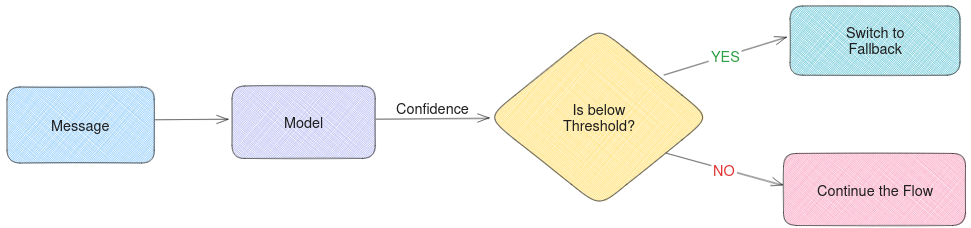
Setting our threshold in general means that if the model confidence on user intent is below the threshold, the bot will fallback to the fallback message or document.
The fallback can be a simple message (as "Please rephrase your message" or "Please let me know what you mean by saying this") or the bot can be configured to fallback to a document. This is covered in Creating a bot using Knowledge base
This setting is found in your bot's settings (General Settings)
Sarufi Video series
We have prepared a very easy to learn sarufi series, please watch the series to learn more on how to utlize the platform.